Ostranauts How to Fly and Dock
Newtonian burns, COMMS clearance, and green clamp alignment
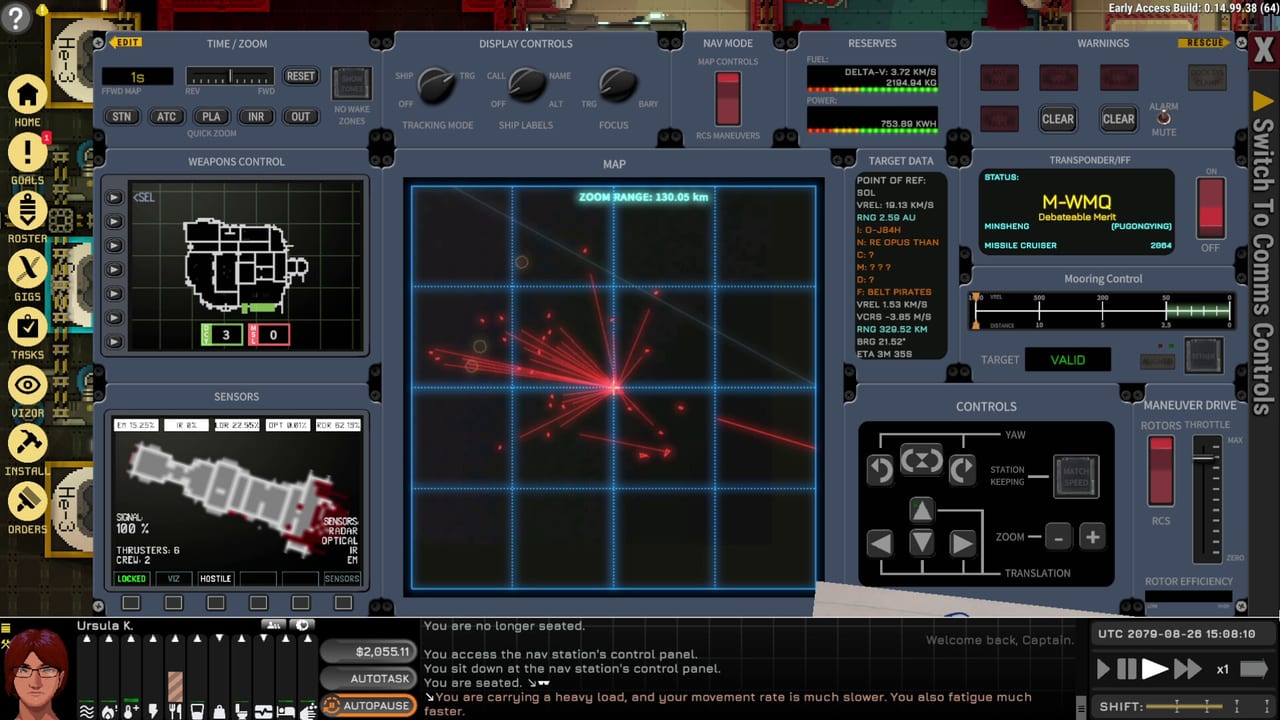
Flight in Ostranauts is fully Newtonian: there is no magic friction, no arcade auto-brake, and no forgiving landing gear on a salvage tub. Every burn you make persists until something else cancels it. That makes docking the skill that separates solvent captains from drifting wrecks — and it is the same skill for OKLG berths, boneyard hulks, and distant stations.
This guide covers RCS attitude control, nav console COMMS workflows, approach geometry, relative velocity, and clamp engagement. Pair it with the nav console reference and keybinds while you practice.
Newtonian basics and RCS
Your ship moves in a straight line at constant velocity until thrusters fire. RCS (reaction control system) jets rotate and translate the hull. Translation along the dock axis matters more than dramatic spins — captains die from closing speed, not from ugly attitude.
Before any maneuver:
- Confirm power to thrusters and nav avionics.
- Read current VREL (relative velocity) toward your target.
- Plan a burn, wait, verify the new vector, repeat.
There is no single “brake” button that ignores physics. To stop closing on a dock, burn opposite your approach vector early, then feather corrections. Overshooting at OKLG often means a long loop back through traffic — expensive in time and shift mortgage pressure.
Nav console and COMMS prerequisites
Docking is not only piloting; it is paperwork and power routing. The nav console exposes COMMS functions: hail, request clearance, dock, undock, and clamp control depending on context.
You need a powered Transponder and Antenna chain. If COMMS buttons grey out or hails fail, walk your power conduits and avionics before you blame the pilot seat. The dedicated nav console page lists command order and common failure states.
Typical undock sequence at OKLG:
- Sit at nav console with ship powered.
- Open COMMS, hail the station.
- Request undock clearance.
- Release clamps when authorized.
- RCS translate clear of the ring before rotating for departure burn.
Redock reverses the flow: approach within roughly 5 km, hail, request dock clearance, align rings, bleed off VREL, engage clamps when indicators go green.
Approach, alignment rings, and VREL
Stations and compatible docks show alignment rings — visual cues that your approach axis matches the berth. Green means acceptable; yellow and red mean adjust pitch/yaw/roll before you commit.
Manage relative velocity in the final kilometer:
- High VREL with green rings still crunches hull plates.
- Near-zero VREL with bad alignment prevents clamp lock.
- Ideal state: green alignment and slow closing speed.
Use short RCS taps rather than holding translation keys. Pulse, observe instrument drift, pulse again. If you have a crew member on nav duty, orders can split workload — see Hire Crew and crew AI behavior.
Clamping and post-dock checks
When clearance and alignment satisfy the dock controller, engage clamps from COMMS or the console workflow your ship exposes. After clamp:
- Verify hard dock state before you cut power to nav.
- Cycle airlocks deliberately; never assume pressure equalization.
- Run an atmosphere checklist if the berth reported leaks or you scraped on approach.
Undocking without clearance can trigger fines or denied services — bad when salvage permits already cost around $5000 per day.
Flying to salvage targets
Boneyard wrecks are not stations; they may tumble, lack working lights, and hide sheared struts. The same Newtonian rules apply:
- Match tumble rate before EVA if you plan to walk the hull.
- Park with low VREL relative to the wreck, not just OKLG.
- Keep transponder on so traffic knows you are a slow salvage tub.
How to Salvage covers on-site work once you are parked. Rescue When Stranded explains what to do when you misjudge fuel or power mid-transit.
Practice plan at OKLG
Spend one in-game shift doing nothing but undock → loop → redock:
- Undock with COMMS clearance.
- Hold position 1–2 km out using RCS.
- Redock without touching the ring.
- Repeat until VREL control feels boring.
Then read Getting Started economics if you have not already, and plan a short boneyard hop. Long-range upgrades belong on the Builds hub — especially the fusion torch drive when you outgrow chemical hops.
Related references
- Controls hub — input and console overview
- Map hub — OKLG traffic and outbound lanes
- Ship Building — moving nav consoles and thruster layout
- Review — how 1.0 flight feels versus Early Access
Frequently Asked Questions
Quick answers for spacers who want to stay alive.
Why will my ship not undock at OKLG?
Check that nav avionics have power, your Transponder and Antenna are online, and you completed the COMMS hail plus undock clearance sequence. See the nav console page for the exact command order.
What VREL should I target before clamping?
Bring relative velocity as close to zero as your instruments allow while alignment rings are green. High closing speed can fail clamps or damage hull even when alignment looks acceptable.
How close must I be to hail for docking clearance?
You generally need to be within roughly five kilometers and on a controlled approach vector. Hail early enough to bleed speed before the final alignment pass.